How to Take a Professional Headshot at Home: A Practical Setup Guide
Use a phone, a window, and a repeatable checklist to create a clear professional portrait without booking a studio.
Quick answer
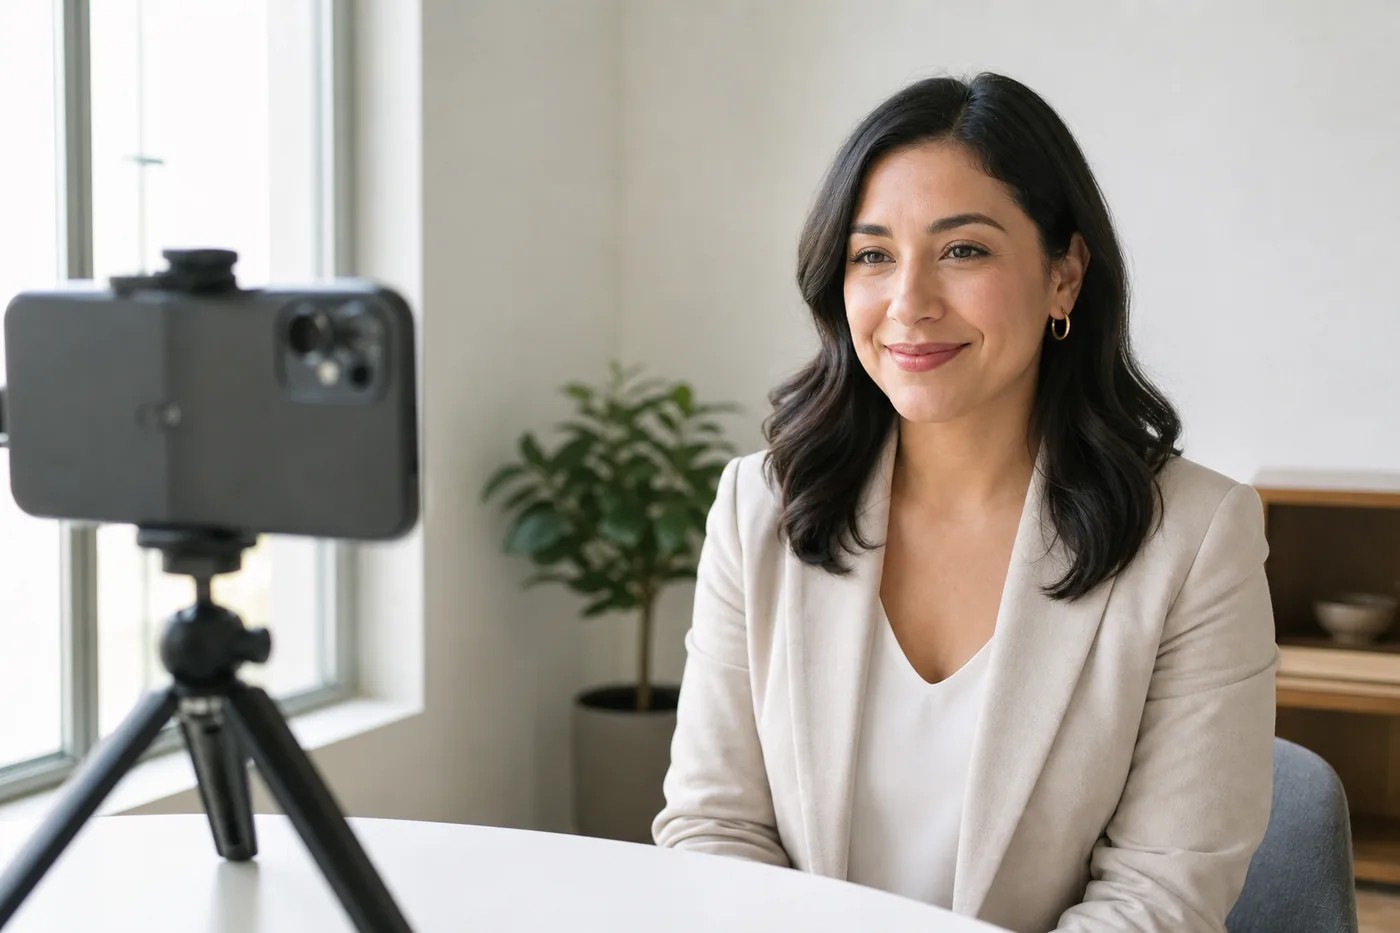
To take a professional headshot at home, place your phone at eye level, face a large window, use a simple background, frame from the chest or shoulders up, and take several expressions and distances. The goal is not a studio look. It is a recent, sharp, recognizable portrait that fits the work or profile context where people will see it.
Table of Contents
A professional headshot does not require a studio, a large camera, or a complicated editing setup. For most profile pages, the important signals are simpler: people can recognize your face quickly, your eyes are visible, the image looks current, and the setting makes sense for the role or community where you will use it.
The hardest part of taking a professional headshot at home is controlling the variables. A phone held too low changes the face shape. A window behind you turns the face dark. A busy room competes with the portrait. A rushed selfie often looks less intentional than a basic tripod setup, even when the phone camera is good.
This guide gives you a practical home workflow. It covers the equipment you already have, a reliable window-light arrangement, background and clothing choices, framing, five useful variations, common mistakes, and a final review process. It is designed for LinkedIn, company pages, portfolios, creator profiles, speaker bios, and other places where a clear personal portrait matters.
What You Need to Take a Professional Headshot at Home
Start with the smallest setup that gives you control. A recent smartphone is usually enough because the final image will often be displayed as a small profile photo rather than a full-screen print. The useful upgrades are stability, light control, and a way to see whether the camera is actually level.
You can take the photo yourself with a timer, but asking another person to press the shutter makes it easier to keep your eyes and shoulders natural. If you are alone, use the rear camera when possible, set a ten-second timer, and mark the chair position with a small piece of removable tape.
A phone camera
Use the cleanest lens and the highest practical resolution. Wipe the lens before shooting and avoid screenshots of a video call or social post.
A stable support
A small tripod is ideal, but a secure stack of books can work if the phone cannot slide or fall. Stability matters more than a premium accessory.
A large window
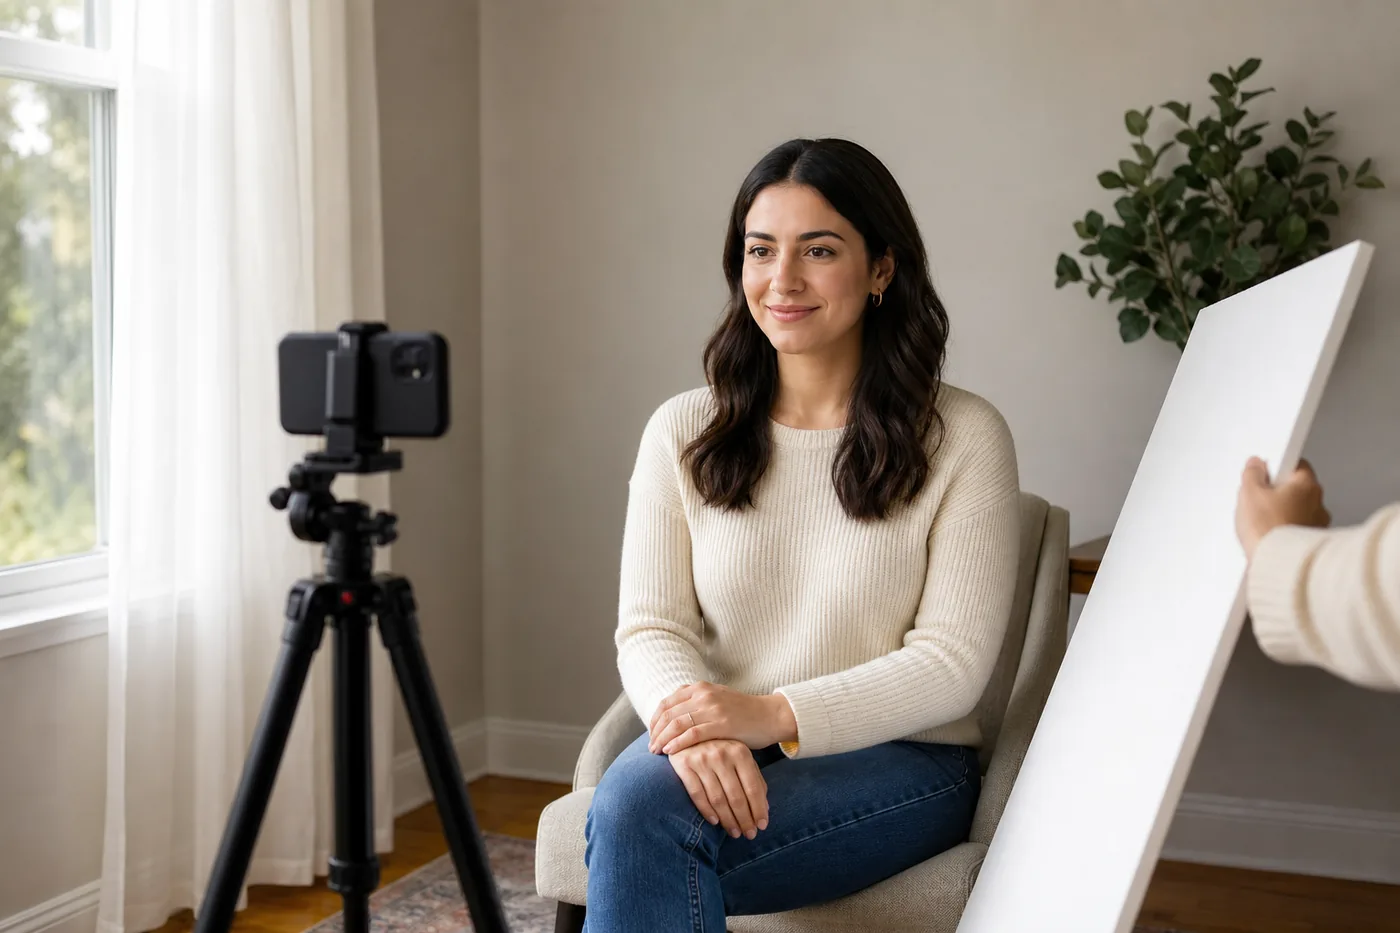
A window with indirect daylight gives broad, soft light. Sheer curtains can reduce contrast when the sun is strong.
A simple background
Use a plain wall, tidy office corner, bookshelf with low contrast, or softly distant room. Remove bright objects near your head.
A timer or helper
A helper can watch the frame and vary the shutter moment. A timer lets you step away from the phone and avoid a stretched selfie pose.
A white reflector
A white poster board, wall, or light-colored curtain can bounce a little light back into the shadow side of the face.
Window Light, Background, and Phone Setup
Set the room before you worry about expression. A good professional portrait is easier to make when the face is bright enough, the background is quiet, and the phone is close to eye level.
| Element | Recommended starting point | What to watch for |
|---|---|---|
| Window | Stand facing the window or turn 20–45 degrees toward it. | Avoid a bright window directly behind your head. |
| Phone height | Place the lens level with your eyes or slightly above. | A low lens can exaggerate the chin and nostrils. |
| Background | Leave about one metre between you and a plain background. | Patterns, clutter, and bright edges pull attention away from the face. |
| Camera mode | Use the normal rear-camera lens when another person can help. | Ultra-wide lenses can stretch the face near the frame edges. |
| Distance | Move the phone back and crop later rather than using a very close selfie. | Extreme close distance increases lens distortion and makes framing harder. |
Framing, Camera Height, and Distance
A professional headshot usually works best as a head-and-shoulders or mid-chest portrait. This gives viewers enough information to recognize you while leaving room for a circular or square crop. Keep the top of the head and both shoulders inside the original frame; platforms may crop more aggressively later.
Place the phone far enough away that the face does not feel stretched. If you use a phone camera with a wide field of view, step back and crop instead of moving the lens close to your nose. Keep the lens clean and avoid digital zoom unless you have tested that it preserves detail.
- Set the lens at eye level. Check the actual lens, not just the centre of the phone screen. A level camera keeps the portrait perspective calmer and more natural.
- Turn your shoulders slightly. A small angle often looks more relaxed than a rigid straight-on pose, while your face can still remain directed toward the lens.
- Leave breathing room. Keep a little space above the hair and around the shoulders. You can crop tighter later, but you cannot recover cut-off hair or chin.
- Look at the lens for the final frame. Looking at the screen can make the eyes appear slightly off-camera. Use the preview for setup, then return your gaze to the lens.
- Take both square and vertical versions. A square crop is useful for profiles, while a vertical frame gives more flexibility for an about page or speaker bio.
- Check the thumbnail. Reduce the image to a small circle or square. If the eyes, hairline, or expression disappear, move closer or simplify the crop.
What to Wear for a Professional Headshot
Choose clothing that supports the context rather than trying to look formally dressed for every situation. A consultant, designer, engineer, teacher, founder, and job seeker may all need a professional portrait, but the credible choice will not be identical. The consistent goal is a clean shape, comfortable fit, and enough contrast from the background.
Solid colors are easier to read than small stripes, dense checks, or very bright patterns. A jacket, knit top, blouse, or collared shirt can work when it fits your role. Avoid a new outfit that makes you adjust your shoulders or neckline every time you move; comfort improves posture and expression.
- Pick one layer with a clear shape and a neckline that feels natural when you sit or stand.
- Use gentle contrast so your shoulders do not disappear into the wall, but avoid a color that becomes the loudest element in the image.
- Remove distracting logos, reflective jewellery, or accessories that cast bright spots near the face unless they are part of your professional identity.
- For a corporate setting, start with the level of formality people in your role actually use rather than an exaggerated interview costume.
- For a creative or founder profile, keep personality in one controlled detail such as color, texture, or a familiar workspace—not in a cluttered background.
- Take one frame with a jacket or structured layer and one without it if you are unsure which version fits your audience.
A Repeatable Five-Shot Workflow
Do not wait for one perfect expression. Take a small set with controlled changes so you can compare the effect of light, distance, and expression. Five useful frames are enough for most home sessions and keep the review manageable.
Ask the person helping you to keep the phone fixed while you change only one variable at a time. If you are using a timer, take short bursts and pause between them so the final selection does not contain the same tense pose repeated twenty times.
- Frame one: calm neutral. Use a relaxed mouth, open eyes, and the most straightforward head-and-shoulders composition. This is your baseline.
- Frame two: slight smile. Keep the same light and camera position, then add a small natural smile. Compare warmth without forcing a wide grin.
- Frame three: small shoulder turn. Turn the shoulders a little while keeping the eyes toward the lens. This tests whether the portrait feels less rigid.
- Frame four: alternate distance. Move the camera back slightly and make a second crop. The more distant frame may look more natural on phones with wide lenses.
- Frame five: context check. Keep the strongest expression but try the second clothing or background option. Choose the version that makes the intended role easiest to understand.
Mistakes That Weaken a Professional Headshot
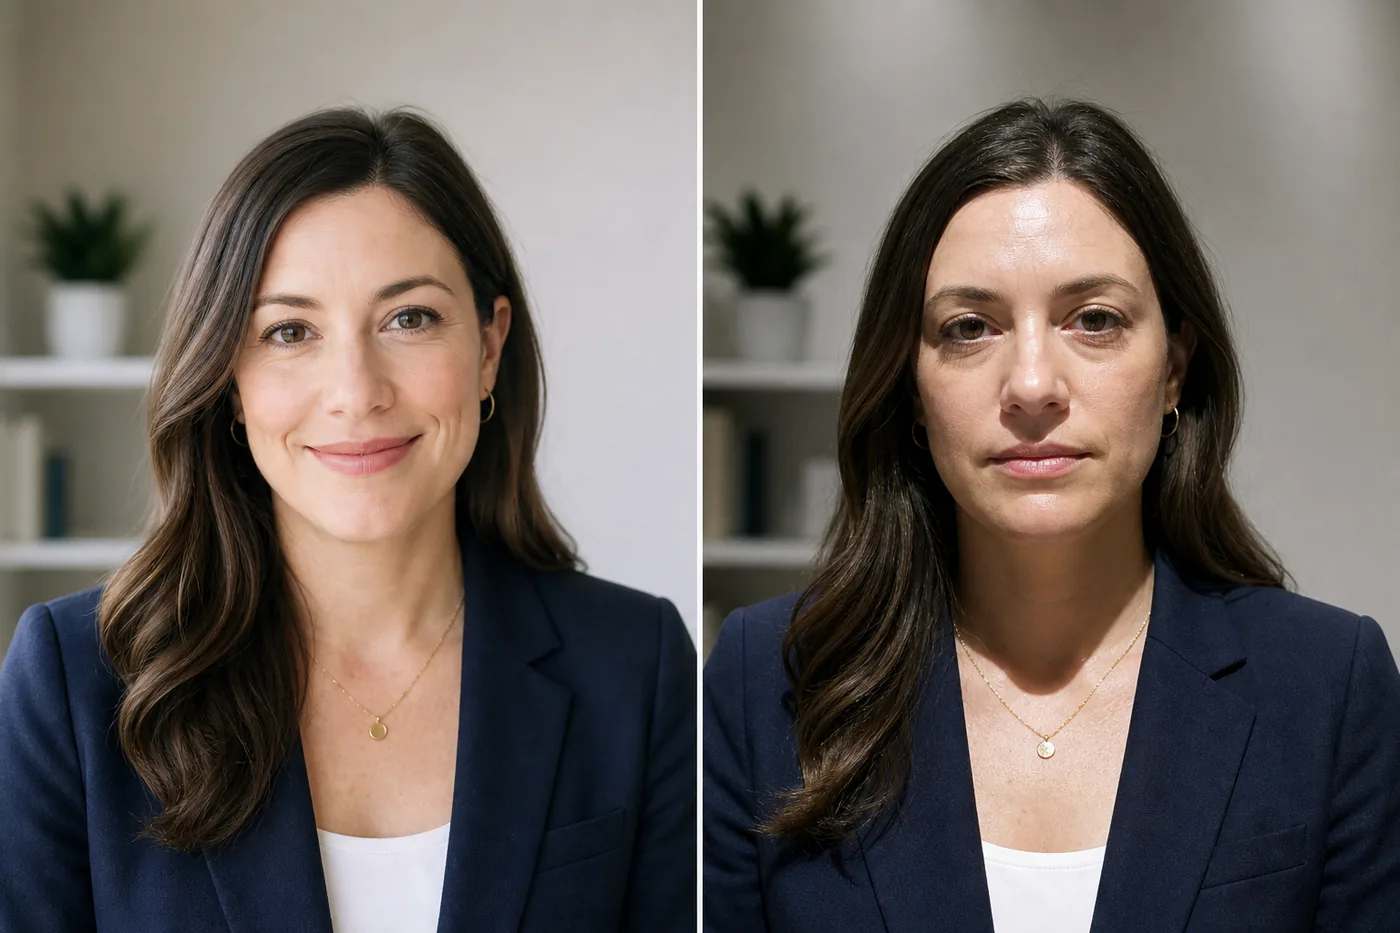
Most weak headshot photos are not ruined by the person. They are weakened by a small technical choice that adds friction for the viewer. Fix the largest problem first instead of applying a heavy filter to every detail.
Keep an original, unedited copy of every candidate. Cropping and mild exposure correction can help, but aggressive skin smoothing, face reshaping, and dramatic color changes can make the image look less current or less like you.
- Backlighting the face so the window is bright and the eyes are too dark.
- Holding the phone below eye level or using an extreme close selfie distance.
- Using a busy room, visible laundry, strong wall art, or a bright object directly beside the head.
- Choosing an outfit that merges into the background or creates tiny high-contrast patterns.
- Taking only one frame and assuming the first expression represents your best professional presence.
- Over-editing skin, jawline, eyes, or hair until the portrait stops matching how people recognize you.
- Uploading a compressed screenshot instead of the original photo file.
How to Review the Final Photos
Review the candidates at two sizes. At full size, check focus, flyaway hair, clothing folds, and accidental background details. At thumbnail size, check whether the face is still recognizable, the eyes remain visible, and the expression communicates the intended level of warmth or confidence.
If two images are close, choose the one that is more believable and easier to use across several contexts. A professional headshot should support trust and recognition; it does not need to win an abstract beauty contest. You can use an AI profile picture rater as a second opinion about clarity, crop, lighting, and presentation, but keep the final decision tied to your audience and role.
Compare a profile photo- Best Profile Picture Guide — Use a thumbnail and context checklist when choosing among several portraits.
- Professional Headshot Prompt Guide — Use AI prompt structure and identity checks when creating a profile portrait variation.
- LinkedIn Profile Picture Checker — Review professional crop, lighting, expression, and role fit before uploading.
- How to Be Photogenic Guide — Practice camera distance, angle, posture, and expression with a repeatable routine.
- Profile Picture Rater — Get structured feedback on a candidate image while keeping the limitations of AI in mind.
Frequently Asked Questions
Can I take a professional headshot with an iPhone or Android phone?
Yes. Use the normal camera, clean the lens, keep the phone stable, and use soft front light. A phone can produce a useful headshot when the lighting and distance are controlled; a newer camera does not automatically fix a dark face or distracting background.
What is the best background for a professional headshot at home?
Start with a plain wall, a tidy room with low contrast, or a softly distant workspace. Leave some distance between your shoulders and the background so it does not look pasted behind you. Avoid bright windows, clutter, and objects that appear to grow out of the head.
What should I wear for a professional headshot?
Wear a clean, comfortable layer that fits the role and contrasts gently with the background. Solid colors are usually easier to read than dense patterns. If your industry is casual or creative, a natural version of your normal work clothing is often more credible than an outfit you never wear.
Should a professional headshot smile?
A smile is optional. Try a calm neutral frame, a slight smile, and a warmer smile under the same light. Choose the expression that feels approachable and believable for your audience. The best expression is usually relaxed rather than exaggerated.
How far should the camera be from my face?
Move the phone far enough away that the face does not feel stretched, then crop the image later. The exact distance depends on the lens and room, but an eye-level phone roughly one to two metres away is a practical starting point for a head-and-shoulders portrait.
Do I need to edit a headshot after taking it?
Usually only light editing is needed: crop, small exposure or white-balance correction, and removal of an accidental edge distraction if appropriate. Keep skin texture and facial proportions natural. Save the original and avoid edits that make the photo look like a different person.
The practical takeaway
A professional headshot at home is mostly a controlled portrait session: stable phone, eye-level lens, soft window light, quiet background, comfortable clothing, and five deliberate variations. Take enough frames to compare, review the result as a thumbnail, and choose the photo that makes you recognizable and credible in the setting where it will be used.